

Design An Amazing Email Validator Using HTML, CSS, and JavaScript
In this comprehensive tutorial, you will learn how to build a fully responsive Email Validator using the combined power of HTML, CSS, and JavaScript. This detailed, step-by-step guide to build an email validator will walk you through the entire process of designing a clean and interactive email input form, and show you how to integrate a reliable Email Validator API to accurately verify email addresses in real-time.
Whether you’re just starting out in web development or looking to sharpen your front-end skills, this project is ideal for both beginners and experienced developers. By the end of this tutorial, you’ll have a functional and professional-looking email validation tool / Email Validator that can be integrated into any web form or contact page.
Our goal is to help you understand how to connect front-end technologies like HTML, CSS, and JavaScript with external APIs to create dynamic and user-friendly websites. You’ll gain valuable experience in handling form inputs, API requests, and intuitively displaying validation feedback to users.
HTML Structure Of Our Email Validator
To begin building our email validator, we’ll start by setting up a simple and straightforward HTML structure to build the email validator. The layout will be minimal but functional, providing the foundation for the rest of the project. First, we’ll create a form element that allows users to input their email addresses. This form will include an input field specifically designed to accept email data, ensuring the format is appropriate for validation. Alongside the input field, we will include a submit button that users can click to send their email for validation.
Once the form is in place, the next step is to display the output or result of the validation process. To do this, we’ll add a separate container element where the response—whether the email is valid or not—will be shown to the user. This completes the basic structure of our application.
Below is the plain HTML code for our email validator. At this stage, it includes no styling and focuses purely on the structure and functionality of the elements.
<!DOCTYPE html>
<html lang="en">
<head>
<meta charset="UTF-8">
<meta name="viewport" content="width=device-width, initial-scale=1.0">
<title>iValidate - Email Validator for your Business</title>
<link rel="stylesheet" href="css/style.css">
</head>
<body>
<header>
<nav>
<div>
<img src="img/email.svg" alt="email svg">
<span>iValidate</span>
</div>
<ul>
<li><a href="/">Home</a></li>
<li><a href="/">About</a></li>
<li><a href="/">Contact Us</a></li>
</ul>
</nav>
</header>
<main>
<div>
<h1>Enter your email to validate</h1>
<form action="/submit" method="post">
<!-- Input Field to Validate Email Address -->
<input placeholder="Enter your email to validate" type="text" id="username" name="username" required>
<br><br>
<!-- Submit button -->
<input id="submitBtn" type="submit" value="Submit">
</form>
</div>
<div>
<h2>Your Results</h2>
<div id="resultCont">
Your results will show here
</div>
</div>
</main>
<footer>
Copyright | iValidate.com | All Rights reserved
</footer>
<script src="js/index.js"></script>
</body>
</html>
Note for Readers:
As you explore the navigation bar, you might come across links such as “/about” and “/contact.” Please keep in mind that these pages are currently placeholders and do not contain any content yet. You are free to create and add these pages to your website later if you choose to expand its structure.
Below is a preview of how the overall layout of our website will appear once we’ve added the basic HTML structure. This foundational design will serve as a starting point for further customization and development.
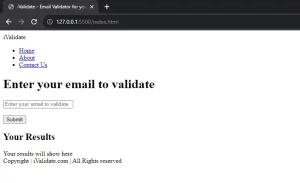
I know, this does not look good at all. Let’s add some CSS to beautify the website:
Adding CSS To Our Email Validator Website
To enhance the appearance and usability of our Email Validator website, we will apply CSS styles along with media queries. These styles will ensure that the layout adjusts smoothly across different screen sizes, making the site fully responsive for mobile, tablet, and desktop users. A responsive design is essential for providing a seamless user experience, especially for those accessing the tool on smaller devices. Right now, the basic HTML structure looks quite plain and unappealing. To improve its visual appeal and functionality, let’s add the following CSS code to style our Email Validator effectively.
@import url(‘https://fonts.googleapis.com/css2?family=Noto+Sans:ital,wght@0,700;1,300&family=Poppins:wght@300;400;500;600&display=swap’);
* {
padding: 0;
margin: 0;
font-family: ‘Noto Sans’, sans-serif;
font-family: ‘Poppins’, sans-serif;
}
nav {
display: flex;
align-items: center;
justify-content: space-between;
background-color: black;
color: white;
padding: 19px 12px;
}
ul {
display: flex;
}
ul li {
list-style: none;
padding: 0 13px;
}
ul li a {
color: white;
text-decoration: none;
}
ul > li > a:hover {
color: rgb(192, 189, 205);
}
main {
min-height: 100vh;
}
.logo img {
width: 15px;
filter: invert(1);
}
.container {
max-width: 80vw;
margin: auto;
padding: 9px 15px;
}
.container h1 {
padding: 12px 0;
}
input[type=’text’] {
min-width: 23vw;
padding: 3px 12px;
border: 2px solid black;
border-radius: 4px;
font-size: 20px;
}
.btn {
background: black;
color: white;
padding: 9px 12px;
border: 1px solid gray;
border-radius: 6px;
cursor: pointer;
}
#resultCont div::first-letter {
text-transform: uppercase;
}
footer {
font-size: 12px;
background-color: black;
color: white;
display: flex;
padding: 12px;
justify-content: center;
align-items: center;
}
@media only screen and (max-width: 600px) {
.container {
font-size: 12px;
}
input[type=’text’] {
width: 100%;
}
nav {
flex-direction: column;
}
.logo {
padding: 6px 0;
font-size: 12px;
}
.logo span {
font-size: 20px;
}
.logo img {
width: 15px;
filter: invert(1);
}
}
After adding all the relevant styles, this is how our webpage will look:
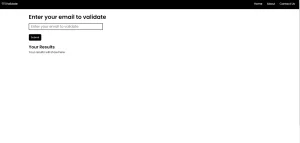
We have successfully completed the frontend portion of our project, including the design and layout using HTML and CSS. Now, it’s time to move on to the backend logic. In this next phase, we will begin writing the code that handles the core functionality—specifically, we’ll be integrating the Email Validation API to collect user-entered email addresses and verify their validity in real-time.
JavaScript – Adding the Logic
We’ll use an Email Validation API for this application. EmailValidation.io offers a powerful and reliable API, making it an excellent choice for our email validator app. Head over to the login page and sign up for an account. The free plan provides 1 API key and 100 requests per month, which is great for testing. For larger-scale use, you can opt for a paid subscription.
To get started, create a new file named index.js inside the js folder. In this file, we’ll write the code needed to validate email addresses using the Email Validation API.
submitBtn.addEventListener("click", async (e) => {
e.preventDefault()
console.log("Clicked!")
resultCont.innerHTML = `<img width="123" src="img/loading.svg" alt="">`
let key = "YOUR-API-KEY"
let email = document.getElementById("username").value
let url = `https://api.emailvalidation.io/v1/info?apikey=${key}&email=${email}`
let res = await fetch(url)
let result = await res.json()
let str = ``
for (key of Object.keys(result)) {
if(result[key] !== "" && result[key] !== " "){
str = str + `<div>${key}: ${result[key]}</div>`
}
}
console.log(str)
resultCont.innerHTML = str
})
Explanation
Let’s break down the code. An event listener is attached to the submitBtn, which prevents the button’s default behavior—submitting the form—by using the preventDefault() method. Next, a console message is logged to confirm the button click, primarily for debugging purposes. After that, the contents of the resultCont element are cleared to prepare it for displaying the validation results. The code then retrieves the API key from the key variable, which is required to authenticate the request sent to the Email Validation API.
Note: Be sure to replace this line with your own API key. You can obtain an API key by logging into your EmailValidation.io account.
let key = "YOUR-API-KEY"
The code begins by retrieving the email address entered in the username input field, which is the address to be validated. It then constructs a URL for the Email Validation API, embedding both the API key and the email address in the URL. A request is sent to the API using the await keyword to ensure the code waits for the API response before proceeding. Once the response is received, it’s parsed as JSON to access the validation results.
Next, the code iterates through the properties of the result object. For each property, it checks if the value is neither empty nor just a space. If valid, it appends a new <div> element containing the property name and its value to the str string. Finally, the str string is displayed in the console and also set as the inner content of the resultCont element.
Note: Be sure to replace the API key in the code with your own. You can obtain a personal API key by logging into your EmailValidation.io account.
Conclusion
And that’s how you can successfully build a fully functional email validator using HTML, CSS, JavaScript, and an Email Validation API. By combining front-end design with JavaScript logic and external API integration, you can ensure that users enter valid and properly formatted email addresses. This not only improves the user experience but also helps maintain the quality of your data. With just a few lines of code and the right tools, you can enhance the reliability and professionalism of your web forms.