

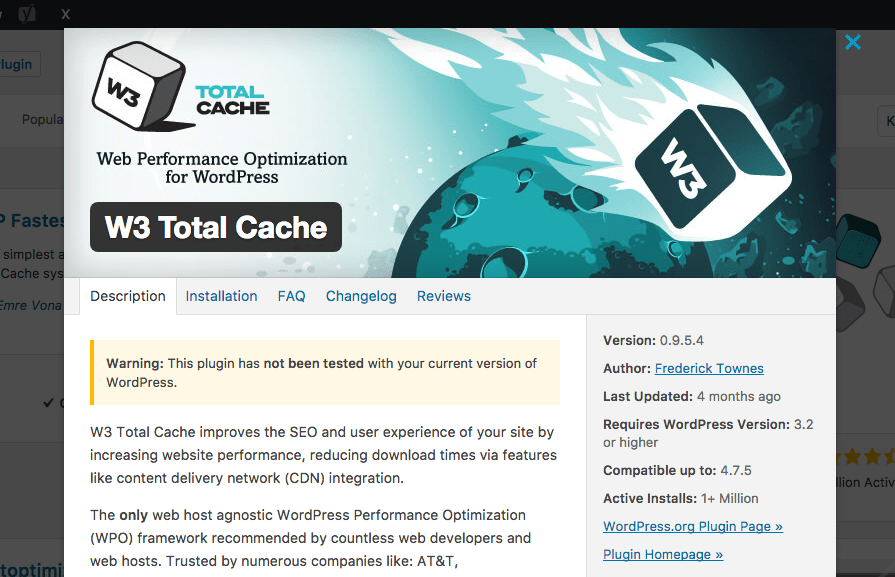
Step-by-Step Guide To Installing W3 Total Cache For WordPress
The faster your website loads, the happier your visitors will be. Additionally, Google rewards sites with faster page speeds by ranking them higher in search results, making speed a crucial factor for your website’s success. But how can you ensure your WordPress website loads quickly?
If you’re new to WordPress and lack a technical background, don’t worry. There’s a simple solution to enhance your site’s speed. This method will save you time and money while attracting more traffic to your website.
In this post, we’ll explore how to install the W3 Total Cache plugin for WordPress. You’ll learn, step-by-step, how to use this plugin to significantly improve your WordPress website’s speed.
Let’s get started!
How To Install W3 Total Cache
After completing the installation process, click on the “Activate” button to enable the W3 Total Cache plugin and get it running on your site.
As another option, you can also download the plugin directly from the WordPress plugin directory and install it manually.
How to Setup W3 Total Cache
Honestly, configuring everything with the plugin might require a bit of time and effort, but it’s definitely worth it. Moreover, once you have everything set up, you can reuse the same configuration for any other WordPress websites you manage. This makes it incredibly simple to export your settings and import them into another site using the same plugin.
Please note that I will only cover the settings where changes are necessary, so not all subsections will be included in the following instructions.
With that in mind, let’s get started!
Step #1: W3 Total Cache General Settings
To begin with, you need to configure some general settings. These settings will be visible once you activate the plugin and navigate to the newly added Performance section in your WordPress admin dashboard.
General:
To begin, navigate to the General section and ensure that the Preview mode remains disabled. There’s no need to activate it at this stage.
Page Cache:
To enable Page Cache, start by ticking the appropriate box. Then, select ‘Disk: Enhanced’ as your Page Cache Method. For those using shared hosting, your options are limited to either Basic or Enhanced. The Enhanced method is generally more effective compared to the Basic one. However, if you encounter any issues or errors while using the Enhanced method, you can easily switch back to the Basic method
Minify:
Minification is the process of reducing the file size of CSS and JavaScript files, which helps improve the user experience by speeding up your website’s loading time.
According to the W3 Total Cache plugin, minification requires testing since every website is unique. Finding the optimal settings for your site will involve some trial and error.
The plugin recommends starting with CSS minification in auto mode. If you encounter any issues, consider testing other options and checking if your theme is compatible with the plugin.
Once CSS minification is set up, you can move on to JavaScript minification. If problems arise, use your web browser’s error console to diagnose issues. If optimization isn’t working, try the “Combine Only” option. Persistent problems may indicate bugs in your theme or plugins, which can interfere with JS minification.
Begin with these settings:
- Minify: Enable
- Minify Mode: Auto
- Minify Cache Method: Disk
- HTML Minifier: Minify (default)
- JS Minifier: JSMin (default)
- CSS Minifier: CSS Tidy (switch to default settings if you encounter issues)
It’s important to bear in mind that the configurations mentioned above are specifically tailored for WordPress sites hosted on shared hosting environments. Therefore, if your website is hosted on a dedicated server or a virtual hosting platform, alternative settings will be required.
Database Cache:
Make sure to tick the “Enable” checkbox next to “Database Cache” and select “Disk” as the preferred method for database caching.
In essence, utilizing database caching will effectively reduce the response time of your WordPress site. Adjust the settings accordingly if your hosting setup is not shared.
Object Cache:
Here, you need to select the option to Enable Object Cache and then choose Disk as the Object Cache Method.
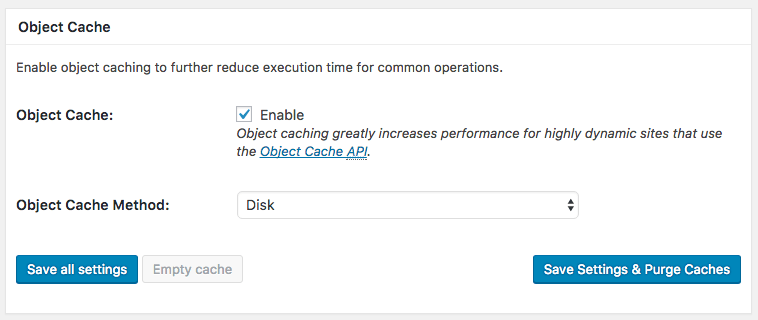
In this context, it’s important to select different settings depending on whether you’re using private hosting or virtual hosting.
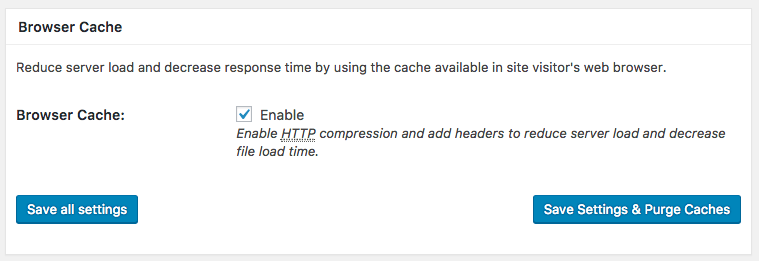
Browser Cache:
This step is straightforward: just make sure to keep the Browser Cache setting enabled.
CDN:
To ensure your website runs smoothly, it’s essential to use a reliable caching plugin and a hosting account capable of handling your traffic needs. With these two components, your site can perform efficiently without the need for a Content Delivery Network (CDN). A CDN becomes necessary only if your website attracts a substantial number of daily visitors. Therefore, unless your site experiences high traffic volumes regularly, you can safely leave the CDN settings disabled.
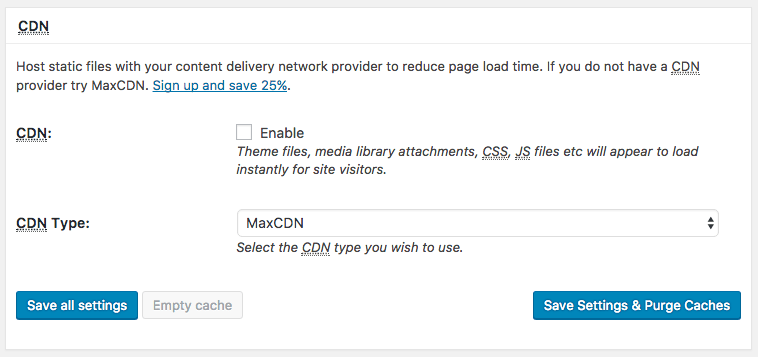
If your website utilizes a CDN, make sure to check the box labeled “Enable” and then select your specific CDN Type from the dropdown menu. This will ensure your CDN is properly configured and integrated with your website.
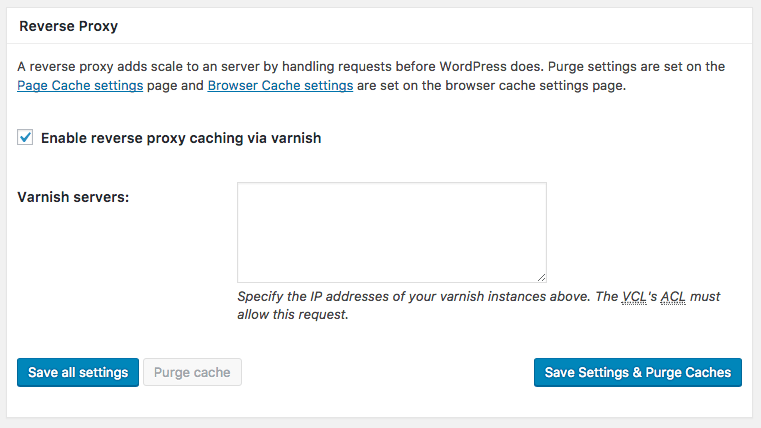
Reverse Proxy:
At this point, you need to activate reverse proxy caching using Varnish. This step is crucial for enhancing your website’s performance by caching content more efficiently.
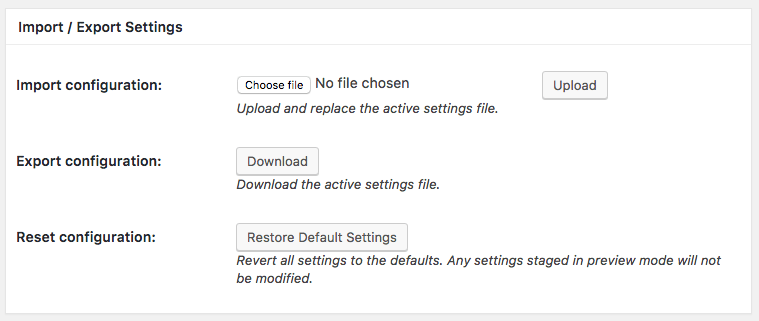
Import / Export Settings:
Are you managing multiple websites that utilize WordPress? Fantastic!
In that scenario, you can save yourself time by exporting the settings you configure when you initially install the W3 Total Cache plugin and applying those same settings to another WordPress site.
So, once you’ve completed this installation and adjusted all the necessary settings, you can export the plugin configuration by clicking on the ‘Download’ button. Then, simply install the W3 Total Cache plugin on your other WordPress website. Under the ‘Import configuration’ section, select your settings file and click ‘Upload.’ This will apply the same optimized settings, ensuring consistency across all your sites.
And there you have it, you’ve completed the general settings! These settings alone will significantly enhance your website’s performance. However, to fully maximize the benefits of the W3 Total Cache plugin, it’s important to explore the detailed settings as well.
So, let’s continue with the next steps!
Step #2: Page Cache Settings
To locate these settings, navigate to the “Performance” tab and then click on “Page Cache” in the left-hand navigation menu within your WordPress admin dashboard.
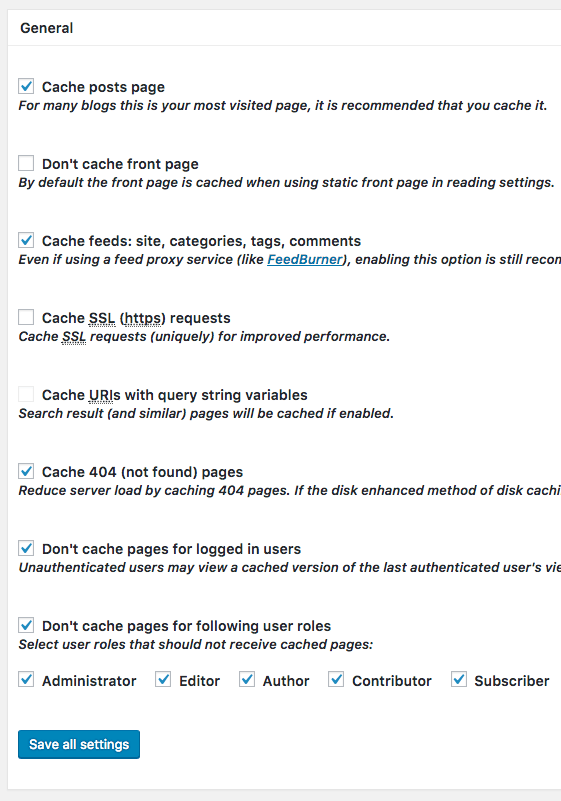
General:
Please configure the following settings as follows:
- Enable caching for posts pages by checking the corresponding box.
- Leave the “Don’t cache front page” option unchecked.
- Check the box to cache feeds.
- If you’re using an SSL certificate, check the box to cache SSL (https) requests.
- Check the box to cache 404 (not found) pages.
- Enable the option to not cache pages for logged-in users.
- Check the box to not cache pages for specific user roles, and make sure to check all the user roles listed below it as well.
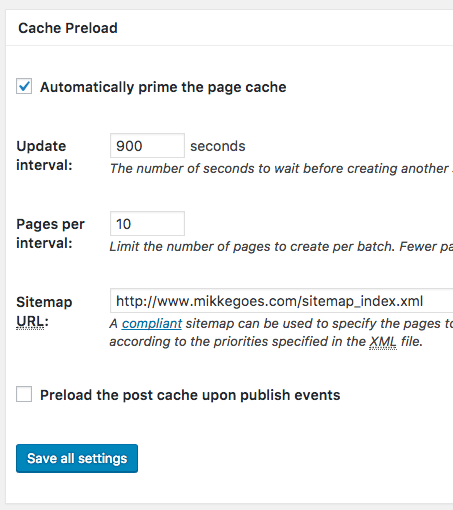
Cache Preload:
Afterward, ensure to tick the box labeled “Automatically prime the page cache” and then proceed to input the URL of your website’s sitemap.
Step #3: Minify Settings
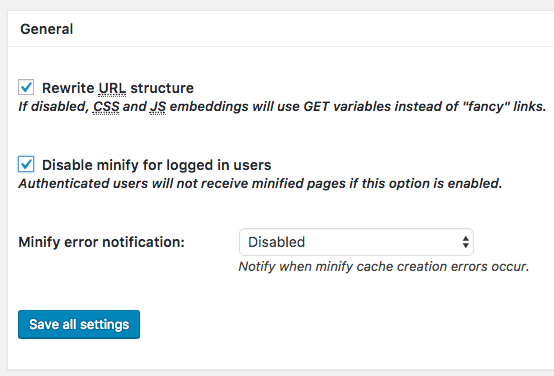
General:
Here are the settings that I would configure:
- Check the box for rewriting URL structure.
- Additionally, check the box to disable minification for logged-in users.
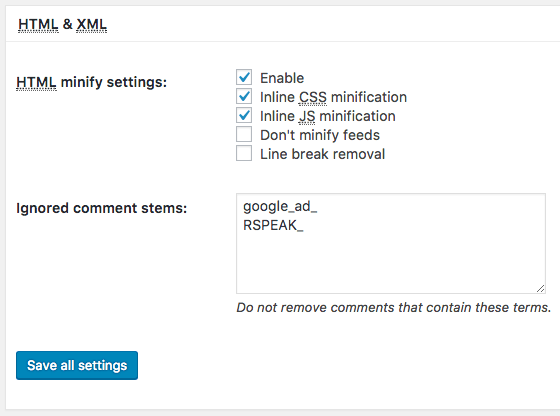
HTML & XML:
Please ensure to tick the boxes below to activate the following options:
- Enable
- Inline CSS minification
- Inline JS minification
Step #4: Browser Cache Settings
General:
Make sure to tick the first six checkboxes listed below:
- Ensure the Last-Modified header is set.
- Ensure the expires header is set.
- Make sure the cache control header is set.
- Confirm that the entity tag (ETag) is set.
- Check that the W3 Total Cache header is set.
- Activate HTTP (gzip) compression.

You know what? You have successfully completed the task!
As a final step, ensure that you have saved all modifications and verified that everything appears satisfactory.
Extensions – Additional Settings to Consider
The W3 Total Cache plugin offers various settings for specific tools commonly utilized. As a result, it’s advisable to review the following extensions within the Performance > Extensions section and enable those relevant to your needs:
- AMP
- CloudFlare
- Google Feedburner
- Fragment Cache
- Genesis Framework by StudioPress
- New Relic
- Swarmify
- Yoast SEO
- WPML
Many users often use Yoast SEO, so ensure to activate its extension if it’s integrated into your WordPress website. If not, consider checking out my article on leveraging Yoast SEO for WordPress SEO!
W3 Total Cache Plugin Troubleshooting
to code
Final Thoughts: Install W3 Total Cache Plugin
Even if you’re just starting with WordPress, you can quickly enhance your website’s speed by following a few simple steps to install W3 Total Cache.
As the number of mobile internet users grows, the speed of your website becomes increasingly crucial. This is an opportune moment to leverage WordPress’s available tools and set up a caching plugin, ensuring your visitors enjoy a seamless user experience.
Have you experimented with W3 Total Cache or other caching plugins for WordPress? Feel free to share your experiences in the comments section below!
If you found this tutorial on installing W3 Total Cache for WordPress helpful, don’t hesitate to leave a comment!
P.S. If you found this information valuable, please consider sharing it with others. Your support is greatly appreciated!
Stay tuned for more articles! Happy coding!
- CODEICAL