

Begin 5 Exciting Web Development Projects this Weekend
With the rapid growth of web development in the industry, the need for web developers is on the rise. The field of web development has shown immense promise, captivating individuals across various academic and professional domains
If you share an interest in web development, the most effective approach to gain expertise in this field is by engaging in web development projects. The greater the time you invest in practicing and experimenting with these projects, the more your skills will flourish.
We are delighted to present you with a compilation of the top five web development projects that will not only enhance your resume and GitHub profile but also increase your chances of securing an internship or job opportunity.
So, let us commence our journey into the world of web development projects!
Text Analyzer
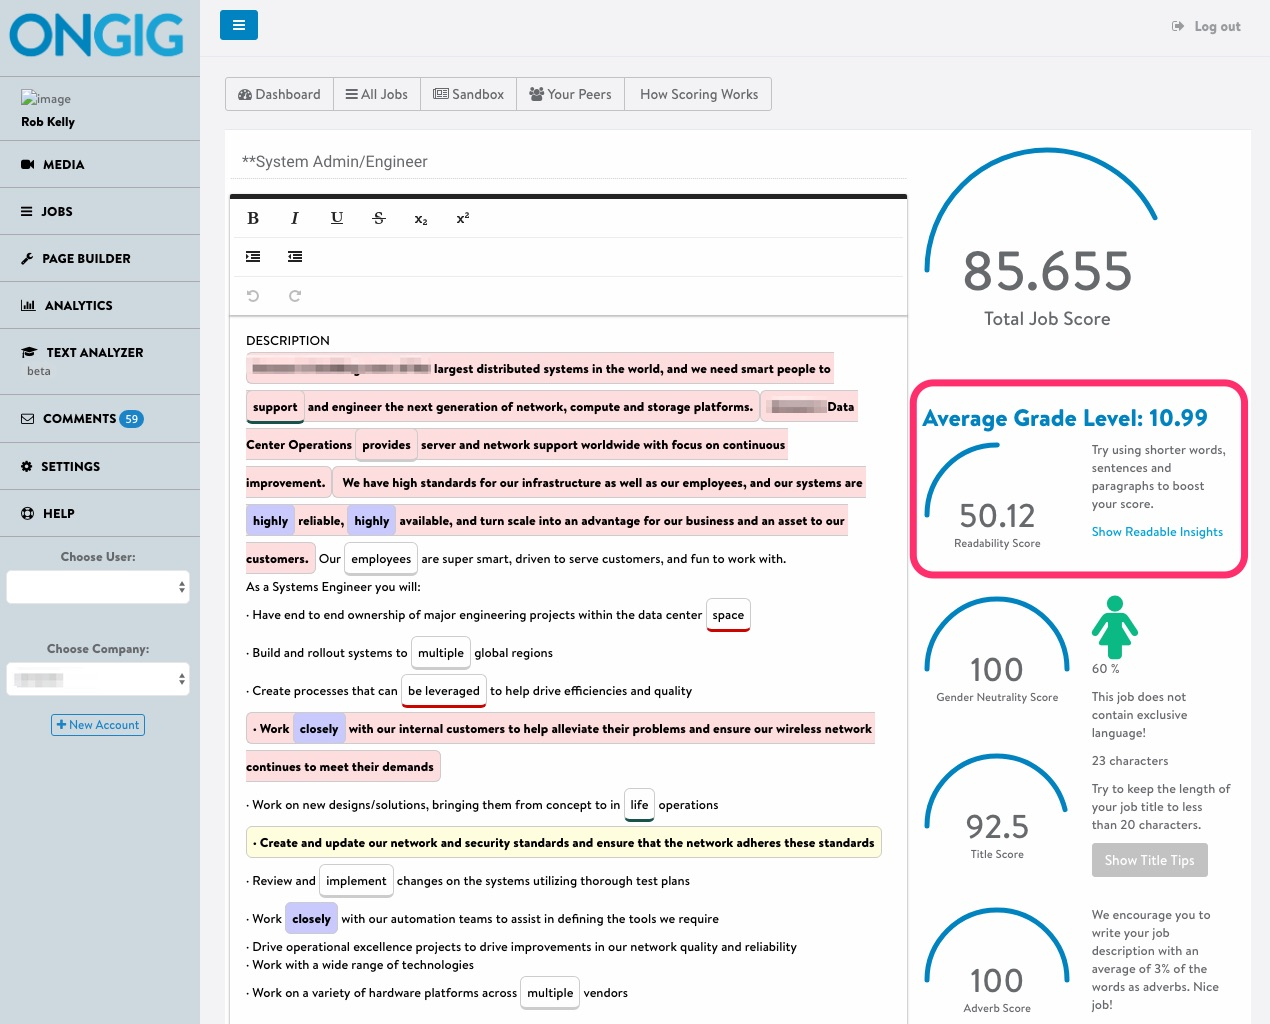
The text analyzer is an incredibly useful software tool that grants you the ability to perform an array of analyses on a given text, enabling you to determine and count the occurrences of various elements such as vowels, punctuations, words, characters, sentences, and paragraphs. This powerful text analyzer can be developed using the simplicity and versatility of JavaScript.
Moreover, the potential of this software can be exponentially enhanced by incorporating cutting-edge technologies like machine learning and deep learning. By integrating these advanced techniques, the software can be taken to new heights, allowing for remarkable functionalities like a Plagiarism checker, which can detect any instances of copied content, ensuring originality. Furthermore, it can even ascertain the tone of the text, whether it leans towards being harsh, sweet, or any other sentiment, opening up possibilities for nuanced analysis and understanding of the content’s emotional tone. The integration of machine learning and deep learning undoubtedly propels the text analyzer’s capabilities to a whole new level.
Simple JavaScript Clock
A simple JavaScript clock is an excellent example of combining basic programming concepts with web development to create a useful and visually appealing timekeeping tool. By using straightforward JavaScript code, you can craft a clock that displays the current time accurately in real time.
Here are the steps on how to create a wall clock using JavaScript:
- Create an HTML file with the following code:
<html>
<head>
<title>Wall Clock</title>
</head>
<body>
<div id=”clock“></div>
<script src=”clock.js“></script>
</body>
</html>
- Create a JavaScript file called
clock.jswith the following code:
function currentTime() {
// Get the current time using the JavaScript Date object.
var date = new Date();
// Extract the hours, minutes, and seconds from the date.
var hours = date.getHours();
var minutes = date.getMinutes();
var seconds = date.getSeconds();
// Format the time and update the clock display.
var time = hours + “:” + minutes + “:” + seconds;
document.getElementById(“clock”).innerHTML = time;
}
// SetInterval() calls the currentTime() function every second.
setInterval(currentTime, 1000);
- Save the HTML and JavaScript files and open them in a web browser. You should see a wall clock that displays the current time.
Here is a more detailed explanation of the code:
- The
currentTime()function gets the current time using the JavaScript Date object. - The
Dateobject has properties for the year, month, day, hour, minute, and second. - The
currentTime()function extracts the hours, minutes, and seconds from the date and formats them into a string. - The
currentTime()function updates the clock display with the formatted time. - The
setInterval()method calls thecurrentTime()function every second.
This is a simple example of how to create a wall clock using JavaScript. With a little more code, you can add additional features to your clock, such as time zone conversion, stopwatch functionality, or even customization with CSS styles.
Notes Taking App
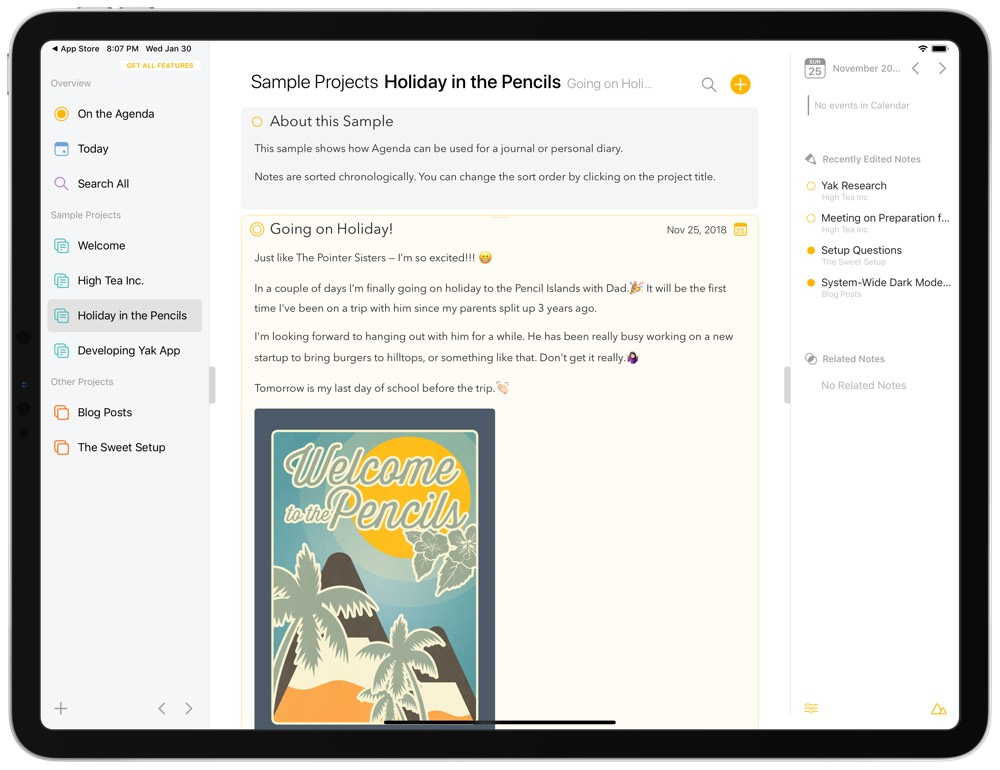
Creating a note-taking app with JavaScript is one of the best and easiest projects you can do.
This project will help you store your personal notes and to-do lists. The data will be saved in your local storage, so you can access it anytime. You can also host the app on your own server, so the data will be stored in the user’s computer’s local storage. This will ensure that the user’s data is private.
Bonus tip: If you have a credit card, you can host your site at a low cost or maybe for free, depending on the hosting providers’ trial offers. Just be sure to read the terms and conditions of the trial offer carefully.
Here are the steps on how to create a note-taking app with JavaScript:
- Create a new HTML file and add the following code:
- Create a new JavaScript file and add the following code:
function addNote() {
var newNote = document.getElementById(“newNote”).value;
var notes = document.getElementById(“notes”);
var listItem = document.createElement(“li”);
listItem.textContent = newNote;
notes.appendChild(listItem);
}
- Open the HTML file in a web browser. You should see a blank page with a heading, a text input, and a button.
- Enter a note in the text input and click the button. The note will be added to the list of notes.
- You can continue to add notes as needed.
To host the app on your own server, you will need to create a server-side application that can serve the HTML, CSS, and JavaScript files. You can use a variety of technologies to do this, such as Node.js or PHP.
Once you have created the server-side application, you will need to configure it to serve the files from the correct directory. You can do this by editing the configuration file for the application.
Once the server-side application is configured, you can test the app by opening it in a web browser. The app should work the same way as it did when it was running locally.
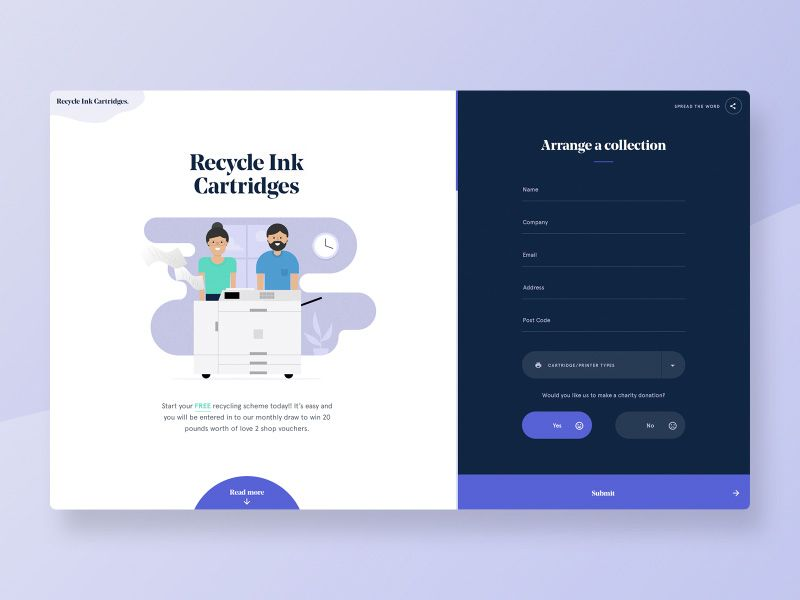
Landing Page With A Form
Sure, here is the rephrased text:
You can create a beautiful landing page design using HTML, CSS, and JavaScript.
To get started, you can try creating a simple form. This could be a survey form, a consultation form, or any other type of form that is relevant to your business. The form should collect relevant information, such as name, address, email address, date of birth, and contact number. Once you have created the form, you can share it with your friends and family to see their responses.
Creating a landing page project is a great way to show off your skills to potential employers. It is also a good way to learn how to use HTML, CSS, and JavaScript. If you are interested in web development, I encourage you to give it a try.
Here are the steps on how to create a landing page using HTML, CSS, and JavaScript:
- Create a new HTML file and add the following code:
<!DOCTYPE html>
<html>
<head>
<title>My Landing Page</title>
</head>
<body>
<h1>My Landing Page</h1>
<form action=“https://www.example.com/submit” method=“post”>
<input type=“text” name=“name” placeholder=“Your name”>
<input type=“email” name=“email” placeholder=“Your email address”>
<input type=“submit” value=“Submit”>
</form>
</body>
</html>
- Create a new CSS file and add the following code:
- Create a new JavaScript file and add the following code:
-
Save all three files and open the HTML file in a web browser. You should see a simple landing page with a form.
-
Fill out the form and click the “Submit” button. The form data will be sent to the URL specified in the action attribute of the form.
This is just a simple example of how to create a landing page using HTML, CSS, and JavaScript. You can add more features to your landing page, such as images, videos, and buttons. You can also style the page however you like.
Weather/News App
Finally, building a weather/news app will help you test your skills and learn about using APIs. You can use two APIs in this project: one to get the user’s location and another to fetch weather data based on the user’s location. As a beginner, having this project in your resume will help you stand out from the crowd.
Here is a more detailed explanation of the two APIs you can use:
- The first API is called the OpenWeatherMap API: https://openweathermap.org/api. This API provides free weather data for any location in the world. You can use it to get the current weather conditions, the forecast for the next few days, and even the historical weather data for a location.
- The second API is called the News API: https://newsapi.org/. This API provides access to a large database of news articles from all over the world. You can use it to get news articles about the weather in a particular location.
To build a weather/news app, you will need to:
- Choose a programming language and framework.
- Create a new project.
- Install the two APIs.
- Write code to get the user’s location and fetch weather data based on the user’s location.
- Write code to get news articles about the weather in the user’s location.
- Create a user interface for your app.
Once you have built your app, you can test it and then deploy it to the app store or Google Play.
Here are some additional tips for building a weather/news app:
- Choose a programming language and framework that you are comfortable with.
- Make sure your app is user-friendly and easy to navigate.
- Use a good design for your app’s user interface.
- Test your app thoroughly before you deploy it.
Building a weather/news app is a great way to learn about using APIs and building mobile apps. It is also a project that can be used to show your skills to potential employers.
Conclusion
Behold the cream of the crop, the top 5 weekend projects in web development! These projects are meticulously curated to be beginner-friendly, offering you the perfect opportunity to not only enhance your skills but also pave the way for a flourishing career as a web developer.
Come, join the journey, and let the wonders of web development unfold before your eyes!